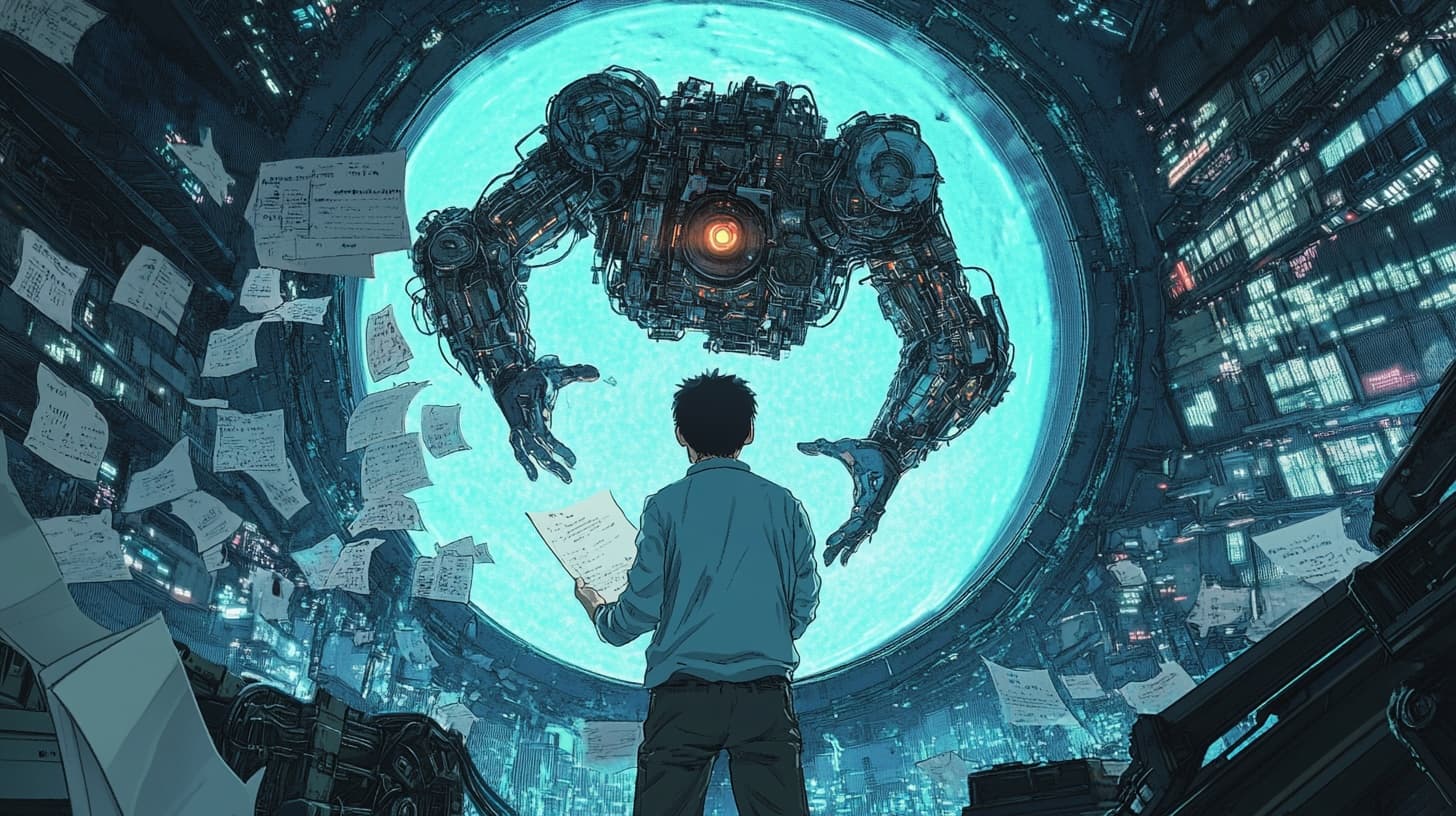
You know the feeling. You've spent twenty minutes getting an image almost right in Nano Banana Pro. The composition is perfect. The product placement is exactly where you want it. The colors sing. There's just one problem: the lighting is a bit flat, and you want more drama.
So you regenerate with "more dramatic lighting" added to your prompt.
The lighting improves. But now the composition has shifted. The product moved. The background changed from deep teal to purple for reasons known only to the model. You didn't ask for any of that. You just wanted better lighting.
This is the tax we pay for what I call vibes-based prompting. You describe something evocative, the model interprets it however it wants, and you hope for the best. Sometimes you get magic. Usually you get a negotiation where you win some and lose some with every regeneration.
Every prompt becomes a roll of the dice. And the frustrating part? Nano Banana Pro is genuinely powerful. It can render exactly what you want. The problem isn't the engine. The problem is that we're gambling when we could be mixing.
The Mixing Board Mental Model
Think about an audio mixing board for a moment. Each channel has its own fader. You can turn up the bass without touching the vocals. You can add reverb to the drums without affecting the guitar. Each element lives on its own control surface, independent of the others.
When a mixing engineer wants more low end, they don't re-record the entire song and hope the bass comes out louder this time. They reach for one fader, move it, and hear the change in isolation.
What if image prompting worked the same way?
What if "lighting" was a fader you could adjust without touching "composition"? What if "camera angle" was independent of "background color"? What if you could reach for one control, move it, and see exactly that change in your render?
That's the promise of structured prompting. Instead of describing your image in a paragraph and hoping the model interprets each element the way you intended, you give each element its own labeled control. Its own fader. And suddenly you're mixing instead of gambling.
What JSON Actually Is
I need to demystify something before we go further, because the word "JSON" makes a lot of people's eyes glaze over. It sounds like programming. It sounds like something developers care about and normal humans don't.
Here's the truth: JSON is just a fancy form. That's it.
You know how a form has labeled fields? Name, address, phone number. You fill in each field with the appropriate value. JSON is the same thing, just written in a way computers can read reliably.
When you write "lighting_direction": "right", you're filling in a form field. The label is "lighting_direction" and the value is "right". When you write "background_color": "#003b47", you're setting another field. Label, value. That's the whole pattern.
The reason models like Nano Banana Pro respond well to JSON is simple: there's nothing to interpret. When you write "dramatic lighting from the side," the model has to decide what "dramatic" means, what "side" means, how intense, what color temperature. When you write "key_light_direction": "right" and "key_light_intensity": "high", there's no ambiguity. You've set the fader position explicitly.
Each field in a JSON spec is a fader on your mixing board. And once you have faders, you have control.
The Translator Command: Your Mixing Board
Here's where it gets practical. You don't need to learn JSON syntax. You don't need to memorize field names or worry about curly braces and commas. I built a translator command that handles all of that for you.
The command works through conversation. You describe what you want in plain English. It asks you clarifying questions, the kind a good creative director would ask: What camera angle? What's the lighting mood? What platform is this for? You answer by picking from options or describing what you're after. And when it has enough information, it outputs a complete JSON spec ready to paste into Nano Banana Pro.
You stay in your comfort zone, talking like a human. The command translates your intent into the structured format the model needs. You get the benefits of precision without learning a new language.
Think of it as a mixing board with an assistant who sets up the board for you based on your description of the sound you want. You still make the creative decisions. You just don't have to wire the console yourself.
Installation
You have two options for getting the command installed. Pick whichever fits your workflow.
Option A: Plugin Marketplace
This is the recommended approach. First, add the marketplace to Claude Code:
/plugin marketplace add https://github.com/jawhnycooke/claude-code-nano-banana
Then install the plugin:
/plugin
Follow these steps:
- Select
1. Browse and install plugins - Select marketplace
claude-code-nano-banana - Press the
Space barto selectnano-banana - Press
ito install - Exit Claude Code
/exit - Restart Claude Code
claude
That's it. The command is now available in your environment.
Option B: Manual Installation
If you prefer to manage files yourself, grab the markdown file from the GitHub repo. Navigate to plugins/nano-banana/ and download nano-banana.md. Create a folder at .claude/commands/nano-banana/ in your project or user directory, and drop the file inside.
Either way, verify the installation by typing /nano-banana in Claude Code. You should see it autocomplete. If it does, you're ready to build your first mix.
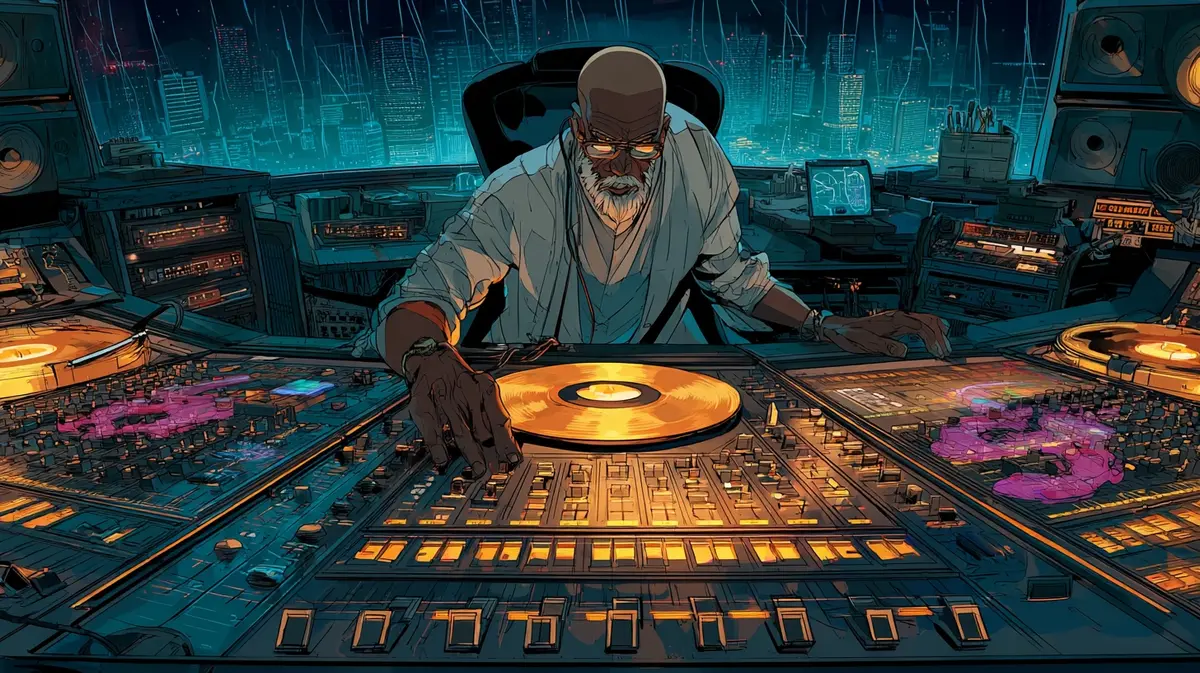
Building Your First Mix
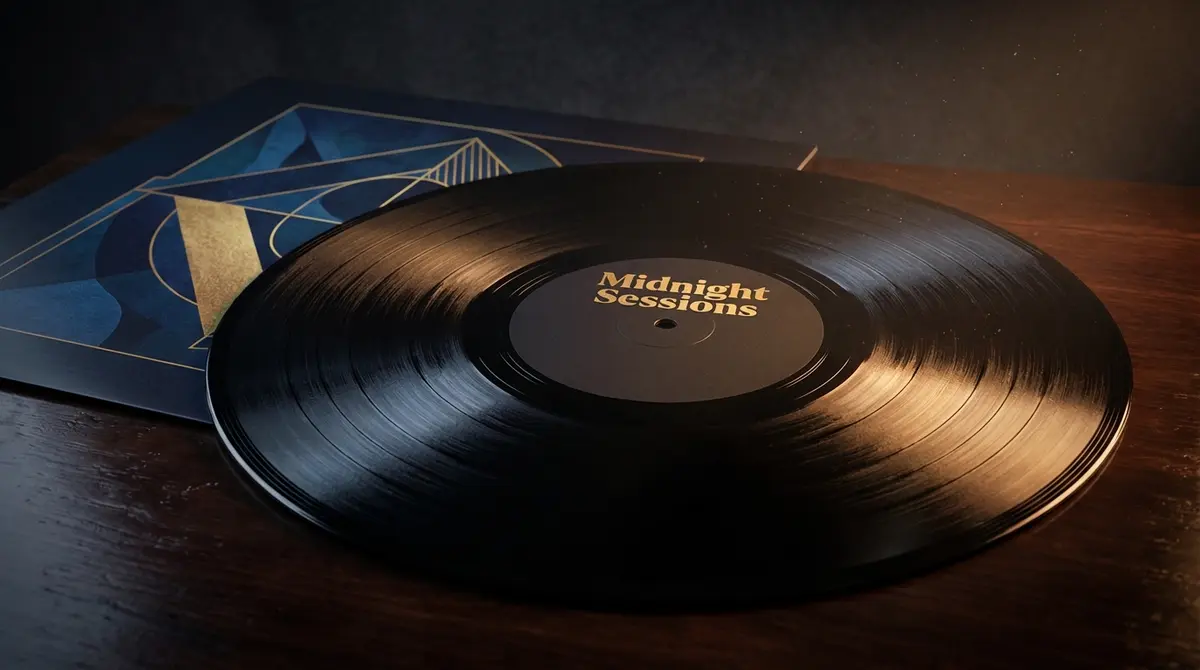
Let's create something together. We're going to generate a vinyl record product shot, the kind of moody, atmospheric image you'd see on a record label's website or an album announcement post.
Start by invoking the command with your rough idea:
/nano-banana vinyl record product shot, moody lighting, vintage feel
The command recognizes this as a marketing image and starts asking questions to dial in your vision.
First, it asks about camera angle. You'll see options like "Front" for a straight-on view, "Three-Quarter" for depth and dimension, "Top-Down" for that flat-lay look. For a vinyl record showcasing the album art and the physical disc, three-quarter works well. It shows the record, hints at the sleeve, and gives the image depth.
Next comes lighting. The options here map directly to faders you'll be able to adjust later: dramatic side lighting for high contrast and mood, soft and even for something more approachable, backlit for that ethereal glow, natural for a lifestyle feel. Since we said "moody," dramatic side lighting fits the brief.
Then background treatment. Solid color keeps it clean and studio-like. Gradient adds modern movement. Bokeh gives you depth with out-of-focus elements. For a vintage vinyl vibe, a solid dark background with maybe a subtle texture works well.
The command keeps asking until it has what it needs: surface material, any props around the record, the overall atmosphere you're going for. Answer honestly. This is where your creative intent gets captured.
When it's done gathering information, it outputs a complete JSON spec. You'll see sections for subject, environment, camera, lighting, props, and controls. Each section is a channel on your mixing board. Each field within those sections is a fader.
Copy the entire JSON output. Open Nano Banana Pro, paste it in with an instruction like "Render this specification as a high-fidelity product photograph," and let it generate.
If you want to skip ahead and see what the output looks like, grab 01-base-render.json from the examples/vinyl-record-tutorial/ folder in the GitHub repo. You can paste that directly into Nano Banana Pro and render it without running through the command yourself.
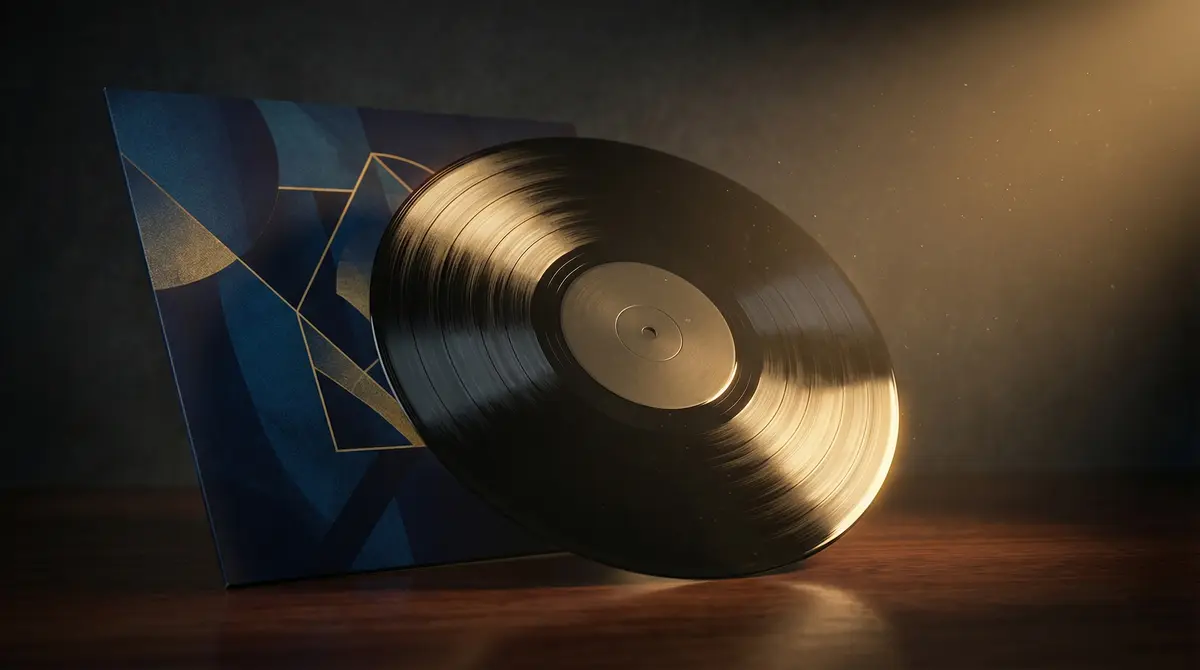
Look at how precisely it honored the spec:
The sleeve: Deep blues and gold geometric artwork, exactly as specified in the props section.
Key light from right: That warm glow hitting the right edge of the record, high intensity creating those dramatic highlights on the grooves.
Rim light: Catching the edge beautifully, separating the record from the background.
Warm color temperature: The whole image has that analog warmth we asked for.
Dark wood surface: With just enough reflection to ground the composition without becoming a mirror.
Dust particles: Subtle but present, catching light on the right side exactly where the key light would illuminate them.
Vignette: Soft falloff pushing focus to the center of the frame.
Every fader we set translated directly into the render. This isn't interpretation. This is execution.
Now let's prove it by moving just one fader.
The Payoff: Moving One Fader
Here's where the mixing board model proves itself.
Look at your rendered image. Let's say the composition is perfect, the record looks great, the background color is exactly right. But the lighting is coming from the right side, and you're curious what it would look like from the left with slightly less intensity. A moodier, more mysterious feel.
In vibes-based prompting, you'd regenerate with new lighting instructions and hope nothing else changes. You'd roll the dice.
With your JSON spec, you reach for specific faders. Find the lighting section. Change "key_light_direction": "right" to "key_light_direction": "left". Change "key_light_intensity": "high" to "key_light_intensity": "medium". Leave everything else untouched.
Paste the modified spec into Nano Banana Pro and render.
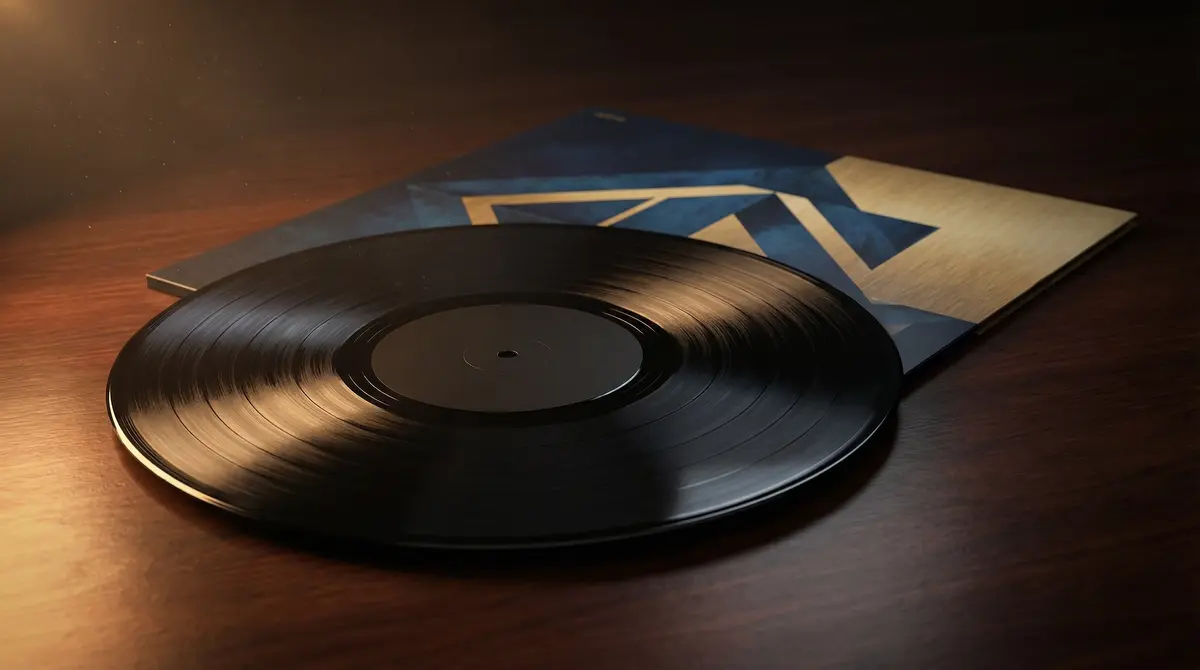
What changed: The light moved. That warm glow is now hitting from the left side instead of the right. The intensity dropped from high to medium, giving us a moodier, more subdued atmosphere. The highlights on the grooves are softer, less dramatic.
What stayed locked: Same vinyl record. Same geometric sleeve artwork with those blue and gold triangles. Same dark wood surface. Same camera angle. Same composition.
You moved the lighting fader. Only the lighting changed.
The repo includes 02-lighting-change.json so you can see exactly what changed between the base render and this variation. Diff the two files if you want to see it in black and white: a few values in the lighting section, nothing else.
Now let's try a bigger change. Go back to your base spec and this time adjust the camera. Find the camera section and change "angle": "three_quarter_front" to "angle": "top_down". You're asking for a flat-lay perspective instead of the dimensional hero shot.
Render it.
Here's where I'll be honest with you: this one didn't go full top-down like we asked. The perspective shifted slightly, but we didn't get the bird's-eye flat-lay view. This happens sometimes. Even with structured specs, the model interprets certain values with more latitude than others.
But notice something else. Look at the record label. It says "Midnight Sessions" in gold lettering. That came from the brand_name field in our meta section. Nano Banana Pro read the spec deeply enough to pull that detail and render it on the label. The model is reading your specification. It's just that some faders have tighter response than others.
This is actually a useful teaching moment. The mixing board gives you control, not a guarantee of pixel-perfect obedience on every parameter. What it does give you is a clear starting point for iteration. You know exactly which fader to adjust. You can try "angle": "overhead" or add a clarifying note in the subject description. You're not starting from scratch and hoping. You're making targeted adjustments to a known specification.
That's the difference between mixing and gambling. Even when a fader doesn't respond exactly as expected, you know which one to reach for next.
You can find 03-camera-angle-change.json in the repo to see exactly what we changed.
Other Channels
The vinyl record example uses the marketing_image schema, which is optimized for product shots, hero images, and brand photography. But the command supports five different schema types, each one a different mixing board for a different kind of session.
UI/UX mockups give you faders for platform, fidelity level, color tokens, layout containers, and individual components. Change your primary brand color in one place and it ripples through every screen. Swap from mobile to desktop viewport without rebuilding your component hierarchy.
Diagrams give you control over nodes, edges, flow direction, and groupings. Adjust the layout algorithm without redrawing your process steps. Change the visual style from clinical to playful without touching the underlying logic.
Data visualizations let you lock your actual data values while experimenting with chart types, color schemes, and annotation styles. The numbers stay accurate because they're specified as constraints. The presentation stays flexible because styling lives on separate faders.
Social media graphics give you platform-aware dimensions, text layer controls, and brand element placement. Switch from Instagram square to LinkedIn landscape and the system adjusts while keeping your headline, subhead, and CTA intact.
Same workflow for all of them. Describe what you want. Answer the clarifying questions. Get a structured spec with independent faders. Iterate by moving one control at a time.
Your Board Is Ready
You've been rolling dice. Every regeneration was a gamble, a hope that the model would interpret your words the way you intended while preserving what was already working. Sometimes you won. Often you compromised. Always you were at the mercy of interpretation.
Now you have a mixing board.
Each element of your image lives on its own fader. Lighting is independent of composition. Camera angle is independent of background. You can reach for any control, move it, and see exactly that change in isolation. No more negotiating. No more hoping. Just mixing.
The command is available in the GitHub repo. Install it through the plugin marketplace or download the markdown file and drop it in manually. The examples/vinyl-record-tutorial/ folder has all three JSON specs from this walkthrough so you can follow along, diff the changes, and start tweaking immediately.
Nano Banana Pro was always capable of precision. Now you have the interface to access it.
Stop rolling dice. Start turning dials.